That spiderweb of cracks on your tennis court isn’t just an eyesore – it’s a warning sign that Asphalt Court Crack Repair is urgently needed. With every rainfall, water seeps into those gaps. That harmless-looking line is an open invitation for its worst enemy: water. Moisture seeps deep into the asphalt, setting the stage for serious damage once the temperature drops below freezing.
When that trapped water freezes, it expands with incredible force—think of how a full ice cube tray bulges upwards. This ice acts like a tiny, powerful jack, pushing the crack wider and deeper from within. This destructive freeze-thaw cycle repeats all winter long, turning a hairline fracture into widespread “alligator cracking” that can cost a fortune to replace. Properly repairing or filling asphalt court cracks is the most important step in preventing this costly damage.
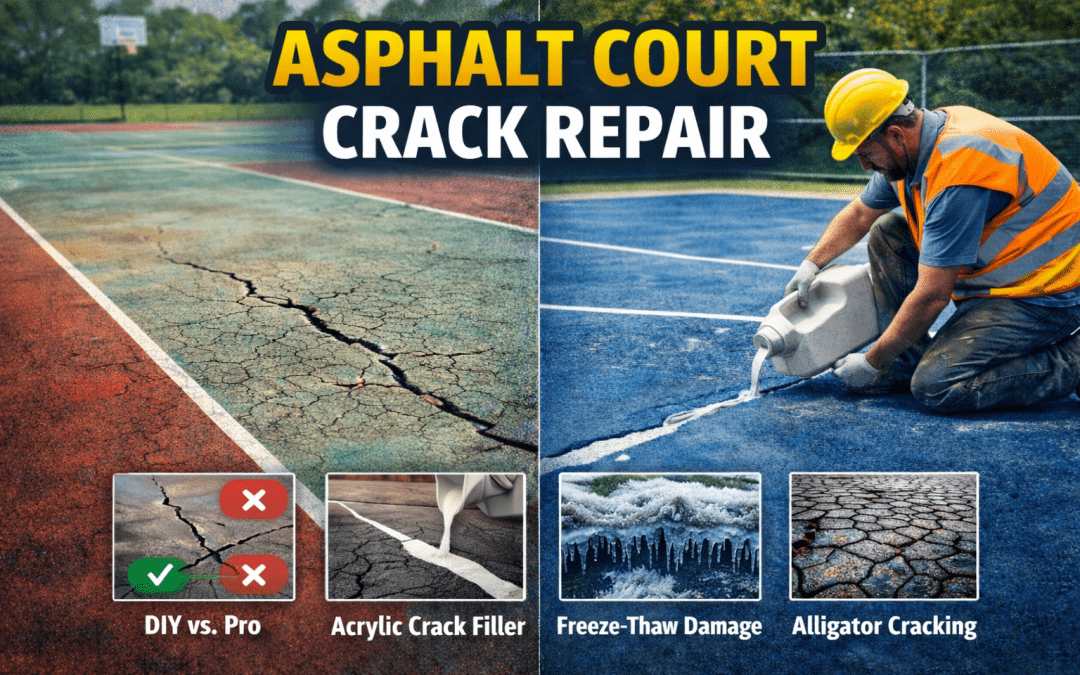
Making the right choice now is key to avoiding an expensive asphalt court resurfacing. The best crack repair systems for asphalt courts are those matched specifically to the damage, and it’s essential to determine if this is a weekend DIY project or a job for a pro.
First Step: Is This a DIY Fix or a Job for a Pro?
Before you head to the store, it’s crucial to know what you’re up against. While many cracks are perfect for a Saturday afternoon project, some are actually symptoms of a deeper problem that a jug of filler can’t solve.
Look closely at the pattern of the damage. Do you see a web of interconnected cracks that looks like shattered glass or the scales on an alligator’s back? This is called alligator cracking, and it’s a major red flag. It signals that the foundation under your court is failing, likely from water damage. Simply filling these surface cracks is like putting a bandage on a broken bone; this is a clear sign to call a professional.
For single, individual cracks, the width is your best guide. As a rule of thumb, if a crack is thinner than a pencil (less than ¼ inch wide), it’s often a great candidate for a DIY repair. Once cracks get wider than a half-inch, they require more heavy-duty materials and techniques, and you’ll get a much better, longer-lasting result by bringing in an expert who specializes in professional sport court services.
Here is your quick guide:
- Single crack thinner than a pencil? Likely a DIY fix.
- Crack wider than ½ inch? Best to call a pro.
- Any sign of an “alligator” pattern? Definitely a job for a pro.

Your DIY Go-To: Choosing a Pourable Acrylic Crack Filler For Asphalt Court Crack Repair
For those DIY-friendly cracks, your best starting point is a pourable acrylic filler. Often sold in a simple jug, you apply it just by pouring it into the crack, where it levels itself out. It’s the perfect DIY asphalt court crack filler for anyone tackling this project for the first time, requiring no special tools beyond basic cleaning supplies.
The single most important secret to a repair that doesn’t fail is flexibility. Your asphalt court moves, expanding in the heat and contracting in the cold. A hard, brittle patch will just crack again under the stress. A flexible crack sealant for outdoor sport courts, however, stretches and compresses with the pavement, keeping the seal intact through the seasons.
When shopping, look for those keywords: “pourable,” “flexible,” and “acrylic.” This combination is your best bet for creating a durable asphalt court crack repair kit. But even the best filler will fail without the right preparation.
The 3-Step Secret to an Asphalt Court Crack Repair That Actually Lasts
The single most critical step is cleaning. Think of it like trying to glue a dusty board—the glue sticks to the dust, not the wood. The same is true for your DIY asphalt court crack filler. Use a screwdriver and a wire brush to clear out all debris, then make sure the crack is spotless and dry. This ensures the filler bonds permanently to the asphalt, not to the loose dirt inside.
With the crack prepared, you can fill it. Pour the filler slowly, allowing it to settle deep into the void. Your goal is to fill the crack completely without overfilling and creating a raised bump on the surface that could affect play or become a tripping hazard.
To finish, lightly drag a putty knife over the repair to make it flush with the court surface. This quick step prevents a ridge from forming as the filler cures.
Your Action Plan: Choosing the Right Path for Your Asphalt Court
By diagnosing the crack, you’ve taken the most critical step in choosing a filler that works and protecting your investment. Here’s your clear action plan:
- For thin, individual cracks (<1/2” wide): This is your weekend project. Proceed with a DIY pourable acrylic filler using the clean, fill, and smooth method.
- For deep, wide cracks (>1/2” wide): Your best bet is to research local sport court contractors like Sport Surfaces for a professional-grade fix.
- For any “alligator cracking”: Do not attempt a surface fix. Call a professional for a foundation assessment to address the root cause.
By taking the right step now, you’re not just making a repair—you’re actively managing future basketball court surface repair cost. A small, smart fix today is the best defense against a premature and expensive asphalt court resurfacing, protecting your court for years of play.